ELEPHANT
So I saw this online when I was surfing the web and thought you guys might like this.
So first you're going to get a light blue ball ( you can also use purple) of polymer clay.

Then you're going to shape out a nose. Just pull out
one side of the circle and smooth it out
Next you're going to take about 1/4 of what's left of the first ball of clay you made. Make it into another ball and cut it in half. Shape the two halves into circles and flatten them. Use a rod or ball tool to make an indentation in the ear.

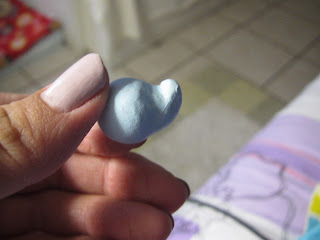
Now connect it to the head and nose. It should look like this.
Take the remaining clay you have and shape it into a cylinder. Next just place the head on the skinnier side of the cylinder. On the opposite side you can create a tail with any clay you have left.
You can the use a ball tool to shape the feet at the bottom of the cylinder.
Just bake it and paint on the eyes, in the picture below i didn't add any detail so you could create yours any way you like.
CUPCAKE
This is my first time making a cupcake too! SO go easy on me kay?
So for this tutorial I mixed Blue with Pearl to get the color on the left, and I mixed Gold, Jewelry Gold, and White to get the color on the right. I used Sculpey clay.
So first I made my blue clay into a cylinder and cut it in half.
Then I smoothed out the sides and flattened the top and bottom.
Then I added ridges to the sides with a thin rod, you can use a ball tool or a toothpick.
Now for the cake part
I rolled out a ball of clay then cut it in half
The attached it to the cup, then I use my finger and slightly smoothed the cup and cake together, Then I used a toothbrush and textured the top, then BAKE! You're done!
BOW.
This is one of my first creations in the world of polymer clay, it's cute, yet easy to make. This tutorial will guide you through the steps of making this adorable bow.
1. Roll out a piece of polymer clay. Make sure it is long and slim.
2. Cut the clay on all four sides, make all sides equal.
3. Fold both sides over so that they are touching.
4. Now, take one flap and put the two corners together, then do this with the other flap.
6. Roll out a small piece of clay, cut into another rectangle. Then wrap around the middle of the bow.
You're done! You can add a circle stick thingy (forgot what it's called) if you want, or make a band and glue it down to make a ring. Don't forget to bake it!!!


Headpin, its a head pin.
ReplyDeleteGreat tutorial, thank you and happy claying!
ReplyDelete